The $200 Part That Controls $200,000 Worth of Assembly
A solder paste stencil costs about $200. It's a thin sheet of stainless steel — typically 100-150µm thick — with laser-cut apertures corresponding to every pad on the PCB. The squeegee pushes paste across the stencil; paste deposits through the apertures onto the pads; the board moves on to placement and reflow.
If the stencil is designed wrong, 60-70% of SMT defects are pre-determined before the first component is placed. Apertures that are too small relative to stencil thickness won't release paste reliably. Apertures that are too large deposit excess paste, causing bridging. Uncompensated aperture shapes create uneven paste volumes on different pad geometries.
IPC-7525 is the standard that defines how to design a stencil that works — aperture dimensions, shape rules, thickness selection, and special treatments. At Superb, every stencil is designed to IPC-7525 guidelines. We don't guess at aperture sizes — we calculate them.
The Two Critical Ratios
IPC-7525 defines two ratios that govern whether paste will release cleanly from a stencil aperture:
Aspect Ratio
Aspect Ratio = Aperture Width ÷ Stencil Thickness
This applies to elongated apertures (rectangles, ovals) where paste must release from two opposite walls.
Minimum: >1.5 (IPC-7525 recommendation)
Optimal: >1.66
Example: For a 0.25mm wide aperture on a 0.15mm thick stencil, AR = 0.25/0.15 = 1.67 → acceptable.
If the aspect ratio is too low, the paste sticks to the aperture walls (more surface area on walls than on the pad below) and doesn't release cleanly. The result: insufficient paste, inconsistent deposits, and weak solder joints.
Area Ratio
Area Ratio = Aperture Area ÷ Aperture Wall Area
This applies to all aperture shapes — the ratio of the opening area (where paste exits to the pad) to the wall area (where paste can stick). It's the more universal metric.
Minimum: >0.66 (IPC-7525 recommendation)
Optimal: >0.75
Example: For a circular aperture of diameter 0.3mm on a 0.15mm thick stencil: - Aperture area = π × (0.15)² = 0.0707 mm² - Wall area = π × 0.3 × 0.15 = 0.1413 mm² - Area ratio = 0.0707/0.1413 = 0.50 → BELOW minimum → unreliable paste release.
The fix: reduce stencil thickness for fine-pitch areas (step stencil), or enlarge the aperture (if spacing allows).
Stencil Design Rules We Follow
1. Stencil Thickness Selection
Stencil thickness is a compromise: thinner is better for fine-pitch (better area ratio), thicker is better for components needing more paste volume (connectors, large passives).
| Pitch | Recommended Thickness | Area Ratio at Minimum Aperture |
|---|---|---|
| ≥0.8mm (standard SMT) | 0.150mm (6 mil) | >0.75 |
| 0.65mm (fine-pitch QFP) | 0.127mm (5 mil) | >0.66 |
| 0.5mm (ultra-fine QFP/QFN) | 0.100mm (4 mil) | >0.66 |
| 0.4mm (micro-BGA) | 0.080-0.100mm (3-4 mil) | Borderline — requires step stencil |
Step stencils: When a board has both large-pitch connectors (need thick stencil for paste volume) and 0.4mm pitch BGAs (need thin stencil for reliable release), we use a step stencil — the stencil is etched to different thicknesses in different areas. This solves the compromise problem but adds cost and delivery time.
2. Aperture Size Reduction
IPC-7525 recommends reducing the aperture size slightly relative to the pad to prevent paste from spreading beyond the pad during printing and reflow. Typical reduction:
| Pad Type | Reduction |
|---|---|
| Standard SMT pads | 10-15% smaller than pad |
| Fine-pitch (<0.5mm)<> | 5-10% smaller |
| BGA pads | 5-10% smaller (or 1:1 for micro-BGA) |
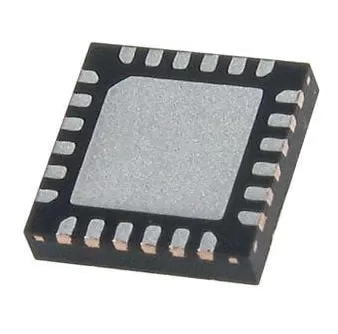
| QFN thermal pad | Segmented into small squares (50-70% coverage) — prevents excessive paste under the package |
3. Aperture Shape
Rectangular pads: Rounded rectangle (radiused corners) — paste releases more cleanly from curved corners than sharp corners.
Circular pads: Circular aperture, slightly undersized.
QFN thermal pads: Window-pane pattern — multiple small square apertures instead of one large aperture. This prevents the paste from "tenting" (forming a dome that lifts the component) and allows flux volatiles to escape.
4. Aperture Orientation
Passives (resistors, capacitors): Home-plate design — the aperture over the pad has a small extension that creates a fillet on the exposed termination, improving inspection visibility.
Fine-pitch leads: Apertures may be slightly elongated to compensate for the paste deposit shrinking during reflow.
Stencil Verification at Superb
Every stencil is inspected before first use:
Visual inspection: Under magnification, verify all apertures are present, correctly shaped, and free of burrs or debris.
First-article print: Print paste on a bare board or glass plate. Check under 3D SPI for paste volume, height, and registration.
Stencil life tracking: Each stencil is tracked by number of prints. After approximately 10,000 prints, the stencil is inspected for wear (aperture enlargement, edge degradation). Worn stencils are replaced — a $200 stencil is not worth a $2,000 batch of defective boards.
What IPC-7525 Means for Your Boards
Stencil design is invisible to the customer — you never see the stencil, and if it's designed correctly, you never notice it. You only notice when it's wrong: inconsistent joints, bridging on fine-pitch parts, tombstoned passives, and field failures traced back to marginal solder volume.
When we design a stencil for your board, every aperture size is calculated against the stencil thickness using IPC-7525 area ratio rules. Fine-pitch areas get step stencils if needed. QFN thermal pads get segmented patterns. Passives get home-plate apertures for inspectable fillets.
You don't see the stencil. You see the results: consistent paste deposits, consistent solder joints, and boards that pass QC on the first attempt.